
What does the Photo-to-Outline app do?
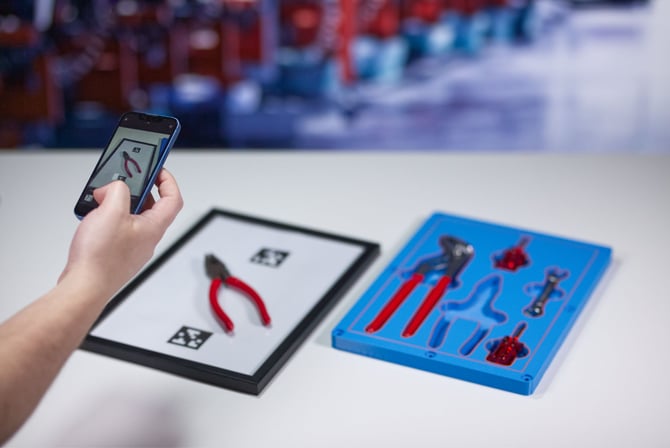
The Photo-to-Outline app converts photos of physical tools and parts into accurate 3D geometry for additive manufacturing. Automatically detect, scale, and convert object outlines without CAD, then export the results or use them directly in apps such as Shadow Boards and Logistics Trays.
How to design with the Photo-to-Outline app
Step 1 – Import
TIP: If you want to explore the workflow first, select Demo Photo to load the included sample data and get a feel for how the app works without preparing your own photo.
To create geometry from your own objects, start by downloading the Reference sheet. Choose A4, A3, or U.S. Letter, select Download, and print the sheet at 1:1 scale so the app can determine the correct dimensions.
Place your tools or parts on the printed reference sheet and take a clear photo from directly above, keeping the reference area visible and leaving space between individual objects.
Once your photo is ready, use Upload photo to select the image from your computer, or drag and drop it into the upload area.
For further guidance on preparing and taking your photo, select Learn more under Need help?
Step 2 – Outline
The Outline step shows the detected shape of your object in the main workspace. The green area represents the outline that will be used to generate the 3D model.
Use Adjust your outline offset on the left to fine-tune the detected boundary. Increasing or decreasing the offset expands or contracts the outline, allowing you to compensate for the detection result or create additional clearance around the object.
Review the green preview as you make adjustments. Once you're happy with the outline, select Continue to proceed to the Export step.
Step 3 – Export
The Export step shows the generated 3D model in the main workspace, where you can inspect the geometry before exporting it.
Model info displays the overall width, height, and length of the generated model.
Under Model parameters, use Set the height of generated 3D model to control how far the detected outline is extruded, allowing you to create a thicker or thinner model to suit your application.
The Export section provides two options. Select Save file to download the generated model, with the settings icon providing access to export options. Alternatively, select Send to other apps... to transfer the geometry directly into another compatible Additive App Suite workflow.
Use Export scope at the bottom to control which generated geometry is included in the export.
Photo-to-Outline app tips and tricks
- Use the provided template to ensure the app can accurately determine the scale of objects in your photo.
- Take the photo directly from above to minimize perspective distortion and produce more accurate outlines.
- Use good, even lighting to create a clear contrast between your objects and the background.
- Leave space between objects so the app can identify each outline as a separate item.
- Review detected objects before generating geometry and deselect anything you don't want to include.
- Send geometry directly to other apps such as Shadow Boards or Logistics Trays to continue your workflow without exporting and reimporting files.