
What does the Robotic Fingers app do?
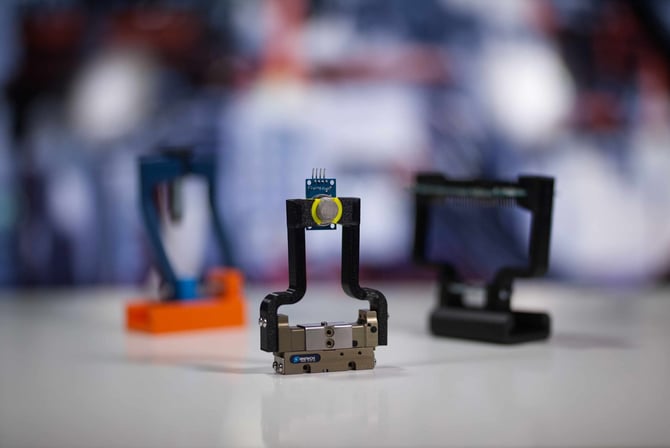
The Robotic Fingers app generates custom robotic gripper fingers that conform to the shape of your workpiece, allowing robots to grip parts securely and repeatably without manual CAD design. Supporting both internal and external gripping, the app produces print-ready fingers tailored to your component in just a few steps.
The app also supports integrated dual-material finger designs, allowing rigid materials such as PLA or PETG to be combined with TPU contact surfaces in a single print. This improves grip, increases friction, and helps protect delicate or irregularly shaped parts during handling.
Typical applications include:
- Pick-and-place automation
- Machine tending
- Assembly operations
- Packaging and palletizing
- Quality inspection
- Bin picking
- Material handling
- Electronics and delicate component handling
Before you begin
You'll need one of the following:
- A 3D model of the workpiece you want to grip (STL, STEP, or 3MF).
- Or, if you'd like to explore the app first, use the included sample data to familiarize yourself with the workflow and features.
Step 1 - Workpiece
The first step is to import the workpiece that your robotic fingers will be designed around.
-
Import workpiece - Select Choose File or drag and drop a supported file into the upload area. Once imported, the workpiece appears in the 3D viewport and becomes the reference geometry used to generate the robotic fingers.
-
Try sample data - Loads an example workpiece so you can explore the app's features and workflow without importing your own model.
Display
Control how the imported workpiece is displayed in the viewport. Choose the display style for the workpiece. For example, Transparent makes it easier to see the generated fingers as they wrap around the part.
Simplification
Enable Simplify workpiece to reduce the complexity of the imported geometry. You can simplify the workpiece along its X, Y, or Z axis, reducing geometric detail in the selected direction. This can improve performance when working with highly detailed models while preserving the overall shape needed to generate the fingers.
Step 2 - Gripper
In this step, you'll configure the gripper that the robotic fingers will mount to. Select a compatible interface, choose whether the fingers grip the inside or outside of the workpiece, and define the gripper's stroke.
Interface - Select a compatible gripper from the library. The app includes interfaces for common grippers, such as the Schunk KGG 60-40, Schunk EPG-40, and OnRobot Hand-E. You can also choose Custom to define your own interface or None to generate fingers without a mounting interface.
Gripping position - Choose where on the workpiece the gripper should be positioned. This determines the initial location of the robotic fingers relative to the imported workpiece.
- Model center – Positions the gripper at the geometric center of the workpiece model.
- Center of gravity – Positions the gripper at the calculated center of gravity of the workpiece. This can provide a more suitable gripping point when the part's mass isn't evenly distributed.
- Custom position – Lets you define the gripping position manually, giving you more control over exactly where the fingers make contact with the workpiece.
Gripping direction - Choose which way the fingers will grip the workpiece
- Outside – The fingers grip the external surfaces of the workpiece by closing around it.
- Inside – The fingers expand inside an opening or cavity in the workpiece to grip it from within.
Fingers distance - Set the maximum opening distance of the gripper fingers. This value is used to ensure the generated fingers are compatible with your gripper's available travel.
Depending on the gripper interface you select, additional configuration options may become available. These settings are specific to the chosen gripper and allow you to tailor the generated fingers to your hardware.
Drill hole offset
Specify an offset for the mounting holes. This can be used to fine-tune the position of the fingers or accommodate variations in your gripper setup.
Step 3 - Fingers
In this step, you'll define the overall shape of the robotic fingers. Choose the finger style, adjust the profile dimensions, and refine the geometry to suit your application.
Finger shape
Choose the style of finger to generate.
- Curved fingers – Creates fingers that follow the contour of the workpiece, providing increased contact area and a secure grip.
- Straight fingers – Generates simple straight fingers that are suitable for many general-purpose gripping applications.
- Fingertips – Generates only the gripping tips, allowing them to be attached to an existing finger design.
Finger profile size
Set the cross-sectional size of the finger body. Increasing this value creates a stronger, more rigid finger, while reducing it produces a lighter, more compact design.
Corner radius
Adjust the radius applied to the finger edges. Larger radii create smoother corners that can improve durability and printability, while smaller values produce a sharper profile.
Step 4 - Fingertips
In this step, you'll refine the gripping surfaces that contact the workpiece. Adjust the fingertip dimensions for the required contact area, then optionally generate a dual-material inlay to improve grip and protect delicate parts.
Size in X, Y, and Z - Adjust the fingertip dimensions independently in each axis to increase or decrease the contact area. Larger fingertips distribute gripping forces over a greater surface, while smaller fingertips can provide more precise contact in confined spaces.
Workpiece offset - Specify the clearance between the fingertip and the workpiece. Increasing the offset creates a looser fit, while reducing it produces a closer-fitting contact surface.
Dynamic finger adjustment - When you reposition or rotate the workpiece, the robotic fingers automatically adjust to its new position. This keeps the finger geometry aligned with the workpiece, so you can experiment with different orientations without having to manually reposition or regenerate the fingers.
Create inlay - Enable this option to generate an integrated second-material inlay inside the fingertip. The fingertip body and inlay are exported as a single assembly, allowing them to be printed together using two materials. For example, a rigid PLA or PETG finger can be combined with a TPU contact surface to improve grip, increase friction, and protect delicate components.
Inlay thickness - Set the thickness of the inlay material. Thicker inlays provide a larger compliant contact surface, while thinner inlays retain more of the rigid finger body.
Labeling - Add text labels to the generated fingers to distinguish between the left and right gripper.
Step 5 - Export
In this step, you'll preview the completed robotic fingers, simulate the gripping position, and export the final design for manufacturing.
Show export preview - Generates a preview of the final printable geometry so you can verify the design before saving the files.
Enable gripping preview - Simulate the gripper in its operating position. This allows you to confirm that the generated fingers engage the workpiece as expected.
Open fingers distance - Adjust the opening distance of the fingers in the preview. Use this to visualize how the gripper approaches and releases the workpiece throughout its range of motion.
Export - Generate and save your completed robotic finger design.
-
Select Save file to export the design. Choose a file name and export format before generating the final files.
-
If you enabled Create inlay, the app exports separate files for the finger body and the inlay. These can be combined in your slicer to produce a single dual-material print.
Export scope - Choose which components are included in the export. For example, you can export the complete finger assembly or individual components, depending on your manufacturing workflow.
App tips and tricks
- Choose the gripping orientation carefully, as it determines where the fingers contact the workpiece.
- Internal gripping is ideal for parts with bores or cavities, while external gripping is better suited to solid or irregular components.
- Use only enough clearance to account for your printer's tolerances, helping maximise grip and repeatability.
- Dual-material prints allow you to combine a rigid finger body with softer TPU contact surfaces in a single print.
- Select materials that match your application, considering grip, wear resistance, temperature, and chemical exposure.
- Print and test a prototype before deploying the fingers in a production cell.
- Save your session if you expect to refine the design later.